The first step to getting your account up and running is to add users. If you don't have too many users to add, then the easiest way to do this is to just add them one at a time.
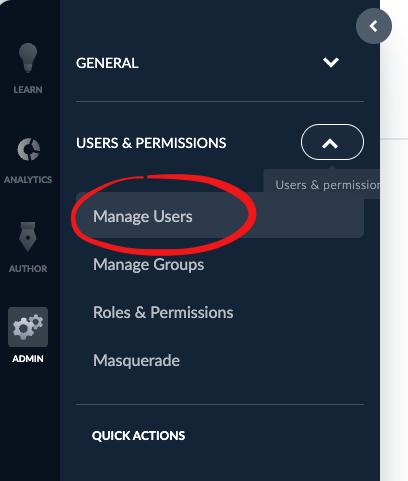
First, navigate to the Admin section using the Application Switcher in the upper right. From there, click on Users & Permissions and in the menu that appears, click Manage Users.
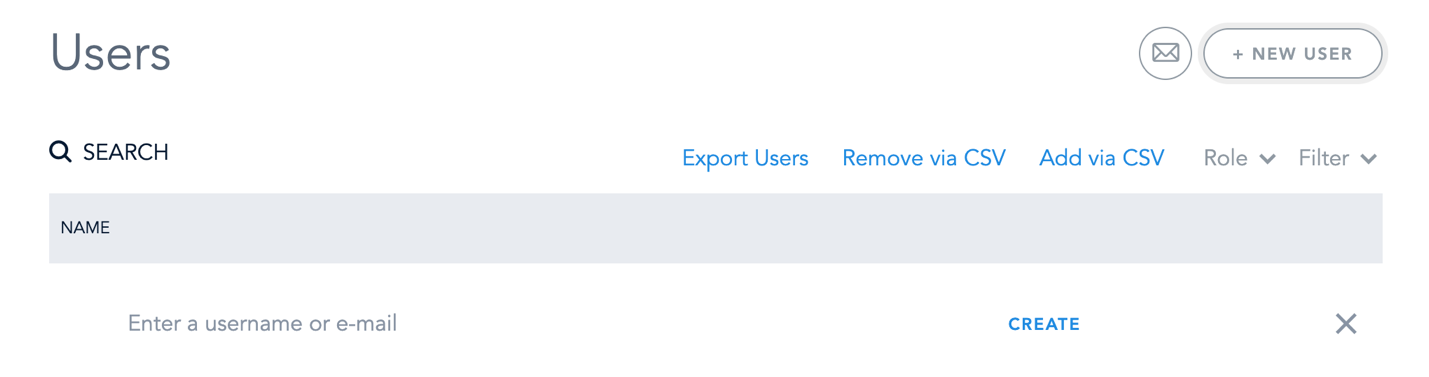
To add a new user, click on +New User on the right side. A text box will appear - type in their Name and click Create.
The final step is to fill in their details. Click on the user you just created to open up their profile. From there, click Edit User at the top. This will bring you to the below screen, where you can click on any field to edit it:
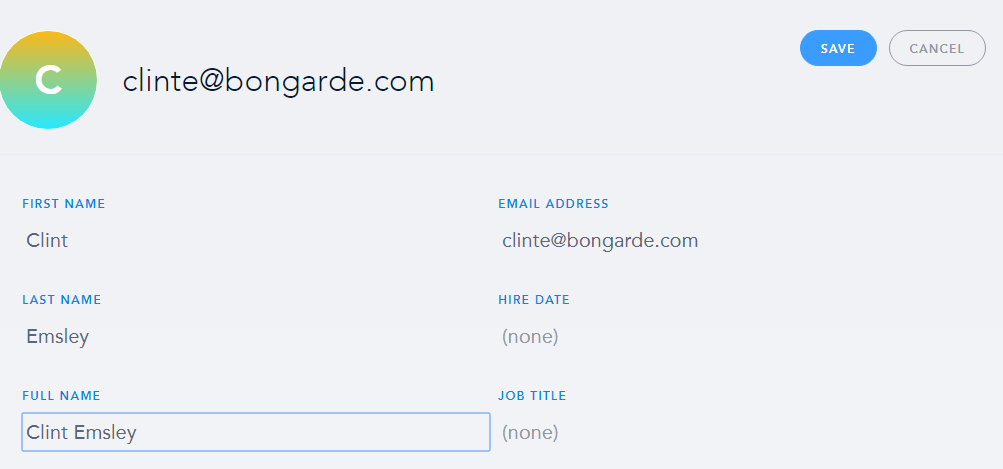
You want to fill out at least First name, Last name, and Full name, as the full name shows up on the certificate. You can also fill out any other fields you want to.
As soon as you click Create, the user will receive an email notifying them of their new account and asking them to create a password (unless you turned those notifications off).
If your user does not have an email address, no problem - just leave that field blank!
Once you're done, click Save.
IMPORTANT! It can take up to 30 minutes for a user to get added - but once they are in the system, your user is ready to go!
Now you can assign them courses and get them started.
Note: If your user doesn't have an email address, you will need to share the URL they need to login with. You can find this by copying the url in the browser bar.

Was this article helpful?
That’s Great!
Thank you for your feedback
Sorry! We couldn't be helpful
Thank you for your feedback
Feedback sent
We appreciate your effort and will try to fix the article