The Analytics Reports will give you a view of all enrolments data in your learning account. These reports will let you pull a comprehensive list of information and allow you to include deleted users!
Note:
To get to the new Analytics reports you will want to select Analytics in the global navigation and then select the Overview option.
Filters in the Analytics report
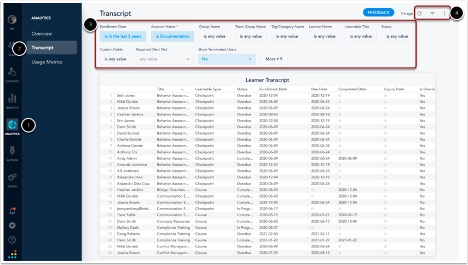
To access the Analytics report you will go to the Analytics [1] option in the navigation menu and select Transcripts View [2]. Here you have several filter options [3] and the options to Search, Hide Filters, and Additional Options [4].
Filter options

There are several filters you can choose from to pull data on your account; Enrolment Date [1], Account Name [2], Group Name [3], Team Group Name [4], Tag/Category Name [5], Learner Name [6], Learnable Title [7], Status [8], Custom Fields [9], Required (Yes / No) [10], Show Terminated Users [11] and additional enrolments and learning item filter options [12].
The Account Name [2] will automatically be selected based on your learning account.
The Required (Yes / No) [10] filter option will allow you to select if you want to look specifically for required or optional enrolments; leaving this filter as-is will search for both enrolment types.
Show Terminated Users [11] will allow you to identify enrollments for all terminated users if needed.
Enrolment Date
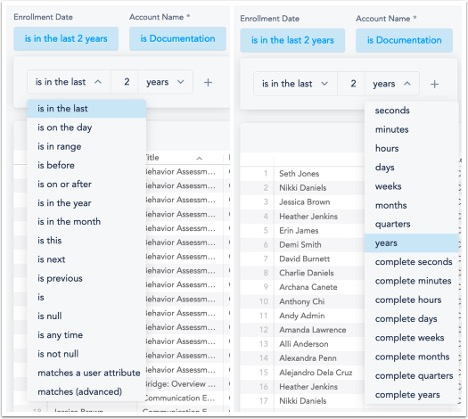
The Enrolment Date filter can be set to various options, as seen in the screenshots above. You can choose from multiple options for this filter, such as 'is in the last' 'x' (this variable is one you manually type in) 'seconds', 'minutes', 'hours', 'days', 'weeks', etc.
Tag/Category Name and Learnable Titles Filter Options
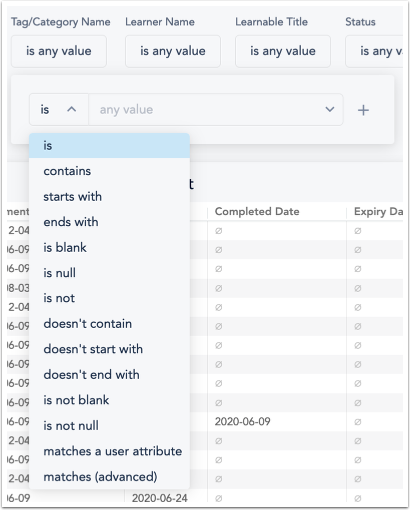
Tag/Category Name and Learnable titles all have the same options that allow you to specify if you want to look for a specific item.
is - This will only pull data for the exact item(s) that you selected.
contains - This will pull data if the enrolment contains any of the item(s) selected.
starts with - This will pull data if the enrolment starts with the item(s) selected.
ends with - This will pull data if the enrolments end with the item(s) selected.
is blank - This will pull data if there is a group, tag/category, or learnable item(s) with no name (aka blank name or title).
is null - This will pull data if there is any item(s) with no name
is not - This will pull data for any item that is not which item(s) you've selected.
doesn't contain - This will pull data for any item that doesn't contain the item(s) you've selected.
doesn't start with - This will pull data for any item that doesn't start with the item(s) you've selected.
doesn't end with - This will pull data for any item that doesn't end with the item(s) you've selected.
is not blank - This will pull data for any item(s) that is not blank.
is not null - This will pull data for any item(s) that is not null.
matches a user attribute - This will pull data for any item(s) that matches the user attribute(s) you've selected.
matches (advanced) - This requires that you type the name exactly and will search as an 'is' statement.
Custom Attributes
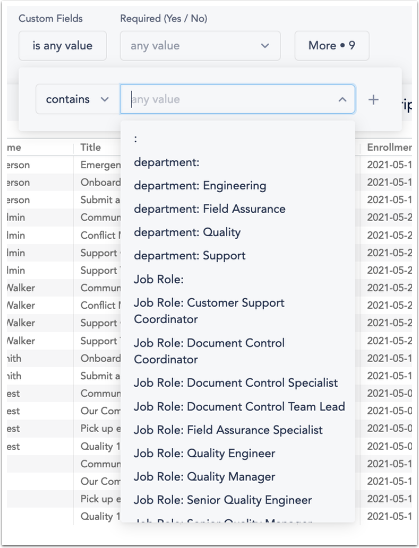
Custom fields filtering dynamically expands the Analytics Transcript table when viewing, downloading, or scheduling the table itself. Here are the steps to ensure that the filtered custom field types are getting into your Transcript table.
1. Select the ‘contains’ prefix from the Custom Fields advanced filter
2. Type the custom field type name (without any value after it) into the Custom Fields filter input field, then hit tab
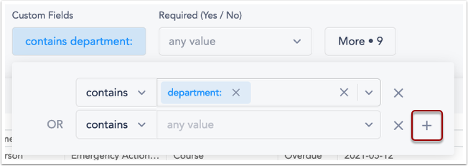
3. See that the custom field type will stick in the Custom Field filter input field
4. You can add another row (and with that another custom field type) by using the ‘+’ button at the right-hand side of the first row
5. Hit refresh at the top right corner of the page to actively filter based on your input criteria
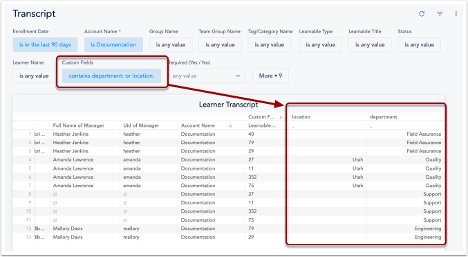
6. See that the data is not only filtered (if any specific criteria are defined), but the custom field type data is added to the far right of the Transcript table. You can drag and drop the columns in whatever order you would like.
Remaining options
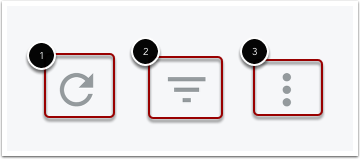
In the top right corner of the Analytics are you will have the option to Update [1], Hide/Show Filters [2], and Dashboard Actions[3]
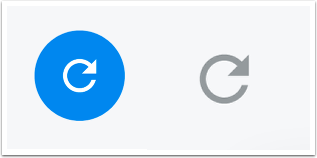
Once you've set up some filters for the search parameters the Search arrow will show up as blue, this indicates there are new options selected that need to be searched for. If you've already hit the search button it will show in grey.
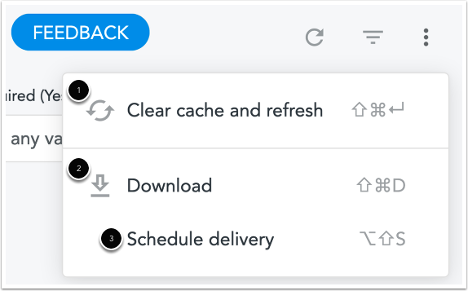
On the more options menu you will see the options to Clear Cache and Refresh [1], Download [2], and Schedule Delivery [3].
Clear cache and refresh - The report will auto-refresh every hour, if wanting to see if new information has appeared since you initiated the search you can select this option. It will then show any new enrolment information that has come in.
Download - This allows you to download the information that appears for your search. This will show the widgets and information within the page as it shows on the webpage.
Download
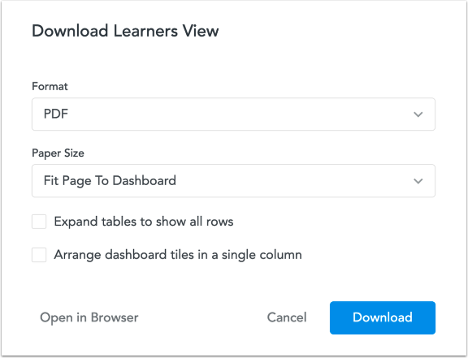
Download allows you to download the information that appears for your search. This will let you choose if you want to download it in pdf or csv format, the paper size, expand tables to show all rows, and arrange the dashboard tiles in a single column. There is also an option open the report in the Browser to view the data.
Analytics Report Schedules
In analytics, you can download data as seen or set up a scheduled delivery.
To download the data as it shows click on the three dots in the top right-hand corner of the table and select Download Data.
To create a scheduled report click on the three dots in the top right-hand corner of the main page and select Schedule Delivery.
Was this article helpful?
That’s Great!
Thank you for your feedback
Sorry! We couldn't be helpful
Thank you for your feedback
Feedback sent
We appreciate your effort and will try to fix the article